In a world that often stereotypes creativity as a feminine pursuit, it’s time to debunk the myth that crafting is exclusively for one gender. The realm of Craft Projects for Men has evolved far beyond the confines of traditional gender norms, and 2023 is set to redefine the narrative with a groundbreaking focus on craft projects tailored specifically for men. Gone are the days when creativity was seen as a predominantly feminine trait; the modern man is embracing his artistic side, seeking satisfaction in the tactile, hands-on experience of crafting. This paradigm shift reflects a growing acknowledgment that creativity also knows no gender boundaries, and the crafting domain is welcoming men with open arms, encouraging them to explore their imaginative prowess through an array of exciting and engaging projects.
Embarking on creative endeavors isn’t limited to any particular gender, and the world of craft projects has become an inclusive space for individuals of all backgrounds. However, for those seeking craft projects tailored to the tastes and interests commonly associated with men, the realm of “Craft Projects for Men” offers a plethora of exciting opportunities. Whether you’re a seasoned DIY enthusiast or a newcomer eager to explore your creative side, this curated collection of projects aims to cater to the diverse preferences of the male demographic. To equip every guy with the essential tools for these endeavors, we’ve also scoured the market to present the “Best Toolkits for Guys,” ensuring that each project is not only enjoyable but also executed with precision and efficiency. Let’s dive into the world of creativity and craftsmanship, where men can unleash their artistic prowess with the best tools at their disposal.
Coffee Table Pallet
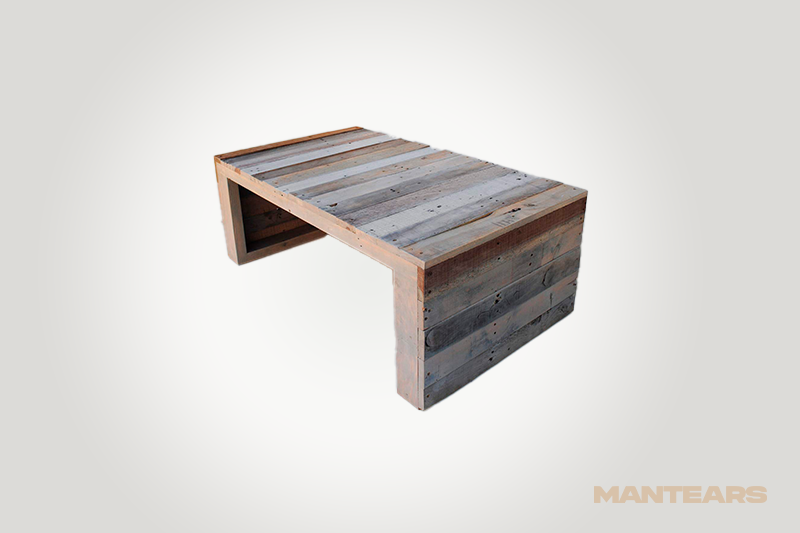
Materials:
1. Wooden Pallet: Choose a sturdy pallet in good condition. You can often find these at local warehouses, grocery stores, or recycling centers.
2. Sandpaper (Medium and Fine Grit): Smooth out any rough edges and surfaces for a polished finish.
3. Wood Stain or Paint: Select a color that complements your existing furniture or fits your aesthetic preferences.
4. Paintbrush or Rag: For applying the stain or paint.
5. Polyurethane Sealant (Optional): Protect the wood and enhance its durability.
6. Saw: To trim the pallet if needed or create a custom size.
7. Drill: Essential for attaching and securing the pallet pieces.
8. Screws: Choose sturdy, rust-resistant screws to assemble the pallet pieces securely.
9. Wood Glue: For additional reinforcement.
10. Measuring Tape: Ensure precise dimensions and a balanced design.
11. Caster Wheels (Optional): Add mobility to your coffee table if desired.
Instructions:
Prepare the Pallet:
– Inspect the pallet for stability and condition.
– Sand the surfaces and edges to create a smooth texture.
– If necessary, trim the pallet to your desired size using a saw.
Stain or Paint:
– Apply the wood stain or paint evenly, following the product’s instructions.
– Allow sufficient drying time between coats for a rich finish.
– If you prefer a natural look, you can skip this step and leave the pallet with its original appearance.
Seal the Wood (Optional):
– If you want extra protection, apply a layer of polyurethane sealant. This will enhance the table’s longevity and make it more resistant to spills and wear.
Assemble the Table:
– Arrange the pallet pieces to form the tabletop, ensuring a balanced and symmetrical design.
– Secure the pieces together using a combination of wood glue and screws. Drill through the pallet slats for a robust connection.
Add Caster Wheels (Optional):
– If you want a mobile coffee table, attach caster wheels to the bottom of the pallet. Make sure they are evenly spaced for stability.
Final Touches:
– Give your DIY pallet coffee table a final once-over, checking for any loose screws or rough edges.
– Place your new coffee table in your living space and enjoy the rustic charm of your handmade creation!
This DIY project allows you to create a unique and personalized coffee table that adds character to your home while repurposing materials in an eco-friendly way. Enjoy your crafting journey!
Pallet Rack
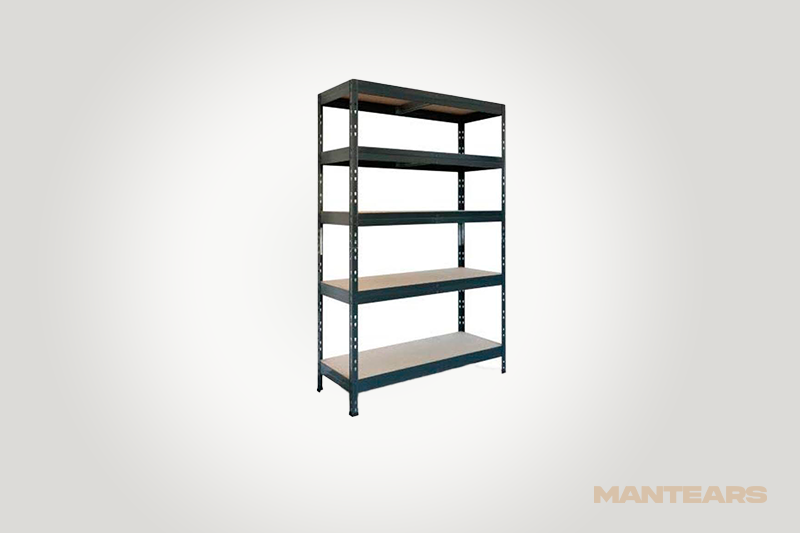
Materials:
- Pallets: Obtain sturdy, intact pallets. You may find these at local businesses, warehouses, or recycling centers. Ensure they are clean and free from any harmful chemicals.
- Pry Bar and Hammer: To disassemble the pallets, you’ll need a pry bar and a hammer. This will help carefully separate the pallet boards without causing too much damage.
- Measuring Tape: Accurate measurements are crucial for a well-built pallet rack. Ensure you have a measuring tape to determine the dimensions for your specific space and storage needs.
- Saw: A saw will be essential for cutting the pallet boards to your desired lengths. You can use a circular saw or a handsaw, depending on your preference and availability.
- Sandpaper or Sander: Smooth out the rough edges and surfaces of the pallet boards using sandpaper or a power sander. This step is important for both aesthetics and safety.
- Wood Screws and Drill: Secure the pallet boards together with wood screws. Pre-drill holes to prevent the wood from splitting. Choose screws that are appropriate for the thickness of your pallet boards.
- Level: To ensure your pallet rack is straight and well-balanced, use a level during assembly. This tool will help you achieve a professional and polished final product.
- Paint or Stain (Optional): If you want to add a personal touch or match the pallet rack to your existing decor, consider using paint or stain. Make sure it’s suitable for indoor or outdoor use, depending on where you plan to place the rack.
Instructions:
- Disassemble Pallets: Carefully disassemble the pallets using a pry bar and hammer. Remove all nails from the boards and set aside the pieces you plan to use.
- Measure and Cut: Measure the lengths you need for the vertical and horizontal pieces of your rack. Use a saw to cut the pallet boards to the desired dimensions.
- Sand the Boards: Smooth out the rough surfaces and edges of the cut pallet boards using sandpaper or a sander. This step will enhance the rack’s appearance and ensure safety during use.
- Assemble the Rack: Arrange the cut pallet boards according to your design, then use wood screws and a drill to securely fasten them together. Use a level to ensure your rack is straight and balanced.
- Optional: Paint or Stain: If you want to add a finishing touch, paint or stain the pallet rack. Allow it to dry completely before using or placing items on the rack.
- Install in Desired Location: Once the pallet rack is assembled and finished, install it in the desired location. Ensure it is stable and secure before loading it with items.
Now you have a functional and stylish pallet rack that not only serves its purpose but also adds a touch of creativity to your space. Customize the design to fit your needs and enjoy the satisfaction of a DIY project well done!
Wooden Beverage Crates
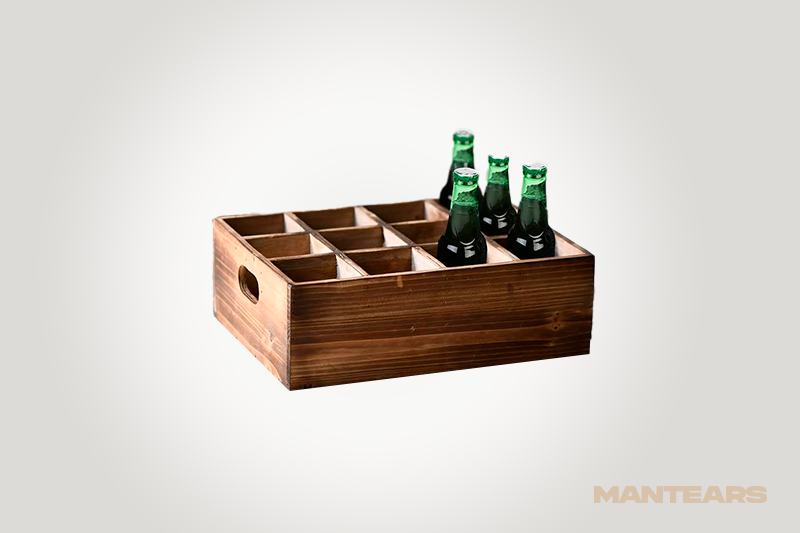
Materials:
- Wooden Planks: Choose sturdy, untreated wooden planks for the main structure of the crate. The dimensions can vary based on your preference, but a common choice is 1×6 or 1×8 boards.
- Wood Screws: Opt for screws long enough to secure the planks together firmly. A mix of 1 ½ -inch and 2 ½ -inch screws should cover your needs.
- Wood Glue: A reliable wood glue will reinforce the joints, adding extra stability to your beverage crate.
- Wood Stain or Paint: Enhance the aesthetic appeal of your crate with a wood stain for a rustic look or paint for a more vibrant finish. Ensure it’s suitable for exterior use if you plan to take your crates outdoors.
- Sandpaper (Various Grits): Smooth out any rough edges and surfaces for a polished, professional look. A range of grits, from coarse to fine, will help achieve the desired finish.
- Wood Sealer (Optional): Protect your creation from the elements by applying a clear wood sealer. This step is especially crucial if your beverage crates will be exposed to outdoor conditions.
Instructions:
Measure and Cut the Wood: Begin by measuring and marking the dimensions of your crate on the wooden planks. Use a saw to carefully cut the planks to the desired lengths, considering the size of the beverages you intend to store.
Assemble the Crate Base: Lay out the cut pieces to form the base of your crate. Apply wood glue along the edges before securing them with screws. Check for squareness as you assemble to ensure a stable foundation.
Add the Side Walls: Attach the side planks to the base using the same glue and screw method. Ensure they stand perpendicular to the base for a secure fit. Repeat this process until all sides are securely attached.
Sand the Surfaces: Smooth all surfaces with sandpaper to eliminate any rough spots or sharp edges. Focus on achieving a polished finish that enhances both the appearance and feel of your beverage crate.
Apply Stain or Paint: Personalize your creation by applying your chosen wood stain or paint. Allow sufficient drying time between coats if needed. This is the step where you can get creative with colors and finishes.
Seal the Deal (Optional): For added protection, especially if your beverage crates will be exposed to the elements, consider applying a clear wood sealer. This step will safeguard your creation and extend its lifespan.
Let It Cure: Allow your wooden beverage crate to cure completely before putting it to use. This ensures the paint or stain sets, and any applied sealant dries thoroughly.
Congratulations! You’ve crafted a stylish and functional wooden beverage crate ready to hold your favorite drinks. Whether for personal use or as a thoughtful gift, this DIY project adds a touch of craftsmanship to your beverage storage solutions. Cheers to your woodworking endeavors! 🍻
Bike Hanger
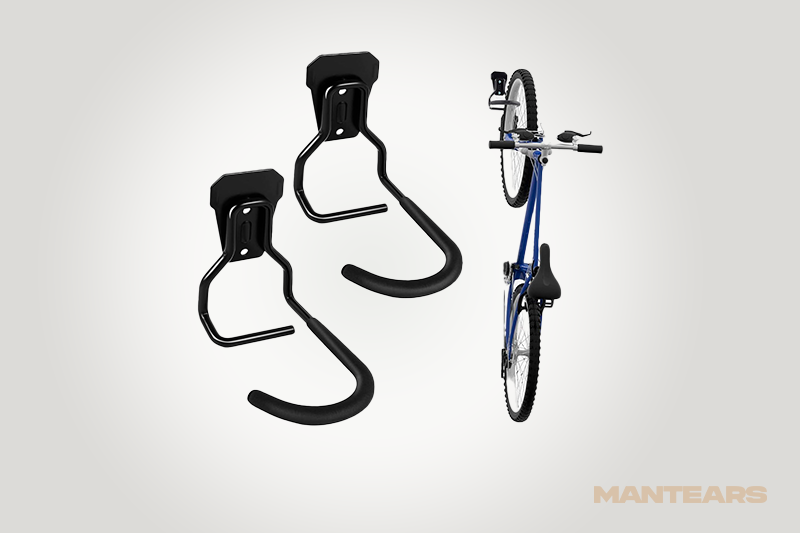
Transform your living space while keeping your bike organized and easily accessible with this simple and stylish DIY bike hanger. No need for fancy tools or advanced carpentry skills – just a few materials and a bit of creativity. Here’s how to get started:
Materials:
Wooden Board (1″ x 8″ x 36″): Choose a sturdy piece of wood that complements your space. You can also opt for a finished board or customize it with your preferred stain or paint.
Bike Hooks (2): Select durable and secure bike hooks capable of supporting the weight of your bicycle. These are commonly available at hardware stores.
Drill with Drill Bits: Ensure your drill bits match the size of the screws that come with your bike hooks.
Screws (8): Use screws that are appropriate for both your chosen wooden board and the bike hooks. The length of the screws depends on the thickness of your board.
Level: To ensure your bike hanger is installed straight and level.
Instructions:
Prepare the Wooden Board:
- If your wooden board is unfinished, sand it to achieve a smooth surface.
- Optionally, apply your chosen stain or paint to enhance the appearance. Allow it to dry completely.
Determine Mounting Location:
- Choose a location on the wall where you want to mount your bike hanger. Make sure it provides enough space for the bike and allows for easy mounting and dismounting.
Mark the Hole Locations:
- Position the bike hooks on the board, ensuring they are evenly spaced and aligned. Mark the spots where you’ll be drilling holes for both the board and the bike hooks.
Drill Holes:
- Use the drill to make holes in the marked spots on the wooden board. Make sure the holes are slightly smaller than the screws to ensure a secure fit.
Attach Bike Hooks:
- Screw the bike hooks into the pre-drilled holes. Ensure they are tight and secure to support the weight of your bike.
Mount the Bike Hanger:
- Hold the wooden board against the wall in your chosen location. Using the drill, attach the board to the wall through the drilled holes. Use the level to ensure it’s straight.
Hang Your Bike:
- Hang your bike by its top tube on the secured hooks. Adjust the placement as needed to ensure stability.
Congratulations! You’ve successfully created a functional and aesthetically pleasing bike hanger. Now, enjoy the convenience of having your bike within arm’s reach while adding a touch of DIY flair to your living space.
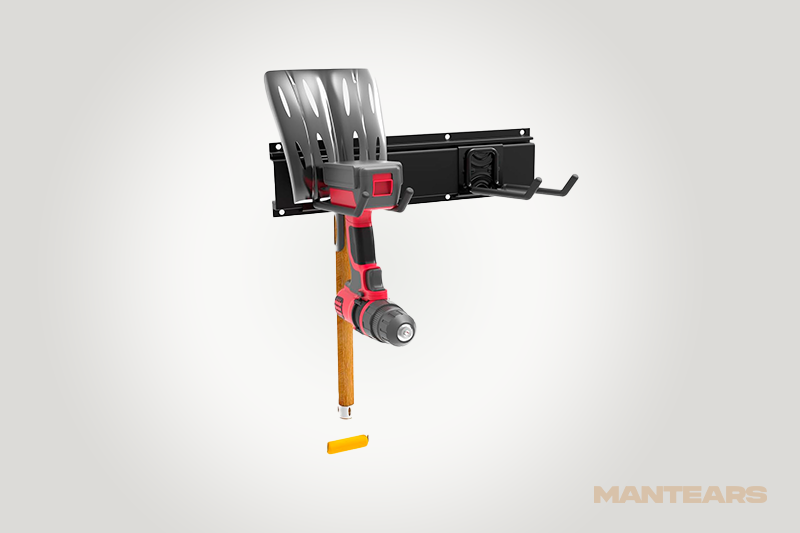
Garage Tool Shelf
Materials:
Plywood Sheets (4’x8′):n2 sheets for the main structure and 1 sheet for the back panel
2×4 Lumber: 8 pieces of 8-foot length for the vertical supports and 4 pieces of 4-foot length for the horizontal supports
Wood Screws: Assorted sizes (2″, 3″, and 4″ screws) for securing the frame and plywood
Level: To ensure your shelf is straight and even
Power Drill: For making pilot holes and driving screws
Circular Saw: To cut plywood and lumber to the desired dimensions
Measuring Tape: For precise measurements
Pencil: To mark cutting lines and screw placements
Safety Gear: Safety glasses and ear protection for cutting and drilling
Instructions:
Measure and Cut: Use the circular saw to cut the plywood sheets to your desired shelf dimensions. Typical measurements are 4 feet in width and 2 feet in height, but adjust according to your garage space and tool storage needs.
Frame Assembly: Lay out the 2×4 lumber to create a rectangular frame. Connect the corners using 3″ wood screws, also ensuring the frame is sturdy. Then, attach the 4-foot horizontal supports evenly spaced along the height of the frame.
Attach Vertical Supports: Secure the 8-foot 2x4s vertically to the corners and center of the frame, creating the main support structure. Use 4″ screws for added stability.
Add Back Panel: Affix the plywood sheet to the back of the frame using 2″ screws, creating a solid back panel for the shelf.
Mount the Shelf: Lift the assembled unit and position it against the garage wall. Use a level to ensure it’s straight, then secure it to the wall studs with appropriate screws.
Optional Finishing Touches: Sand any rough edges and surfaces for a polished look. You can also paint or stain the shelf to match your garage aesthetics.
Now you have a sturdy and customized garage tool shelf to keep your workspace organized. Then, adjust the dimensions and design according to your specific tools and garage layout. Happy crafting!
So…
The realm of craft projects for men in 2023 is a vibrant and exciting landscape, challenging traditional stereotypes and embracing the diverse interests and talents of men in the creative sphere. As we’ve explored various crafting endeavors tailored for the modern man, it’s also evident that these projects offer a unique opportunity for self-expression, relaxation, and the satisfaction of creating something tangible with one’s hands. Whether it’s woodworking, leathercraft, or even brewing your own craft beer, the world of Craft Projects for Men is evolving to cater to the diverse tastes and preferences of men, breaking away from outdated notions that crafting is solely a feminine pursuit.
Craft Projects for Men add a distinct touch of personality and creativity to any home, transforming spaces into unique reflections of individual style. For those who appreciate the finer things in life and enjoy a well-crafted drink, combining these skills with the creation of a personalized home bar becomes a fulfilling endeavor. Whether it’s handcrafted barware, custom signage, or bespoke furniture, the intersection of craft projects for men and the home bar offers a realm of possibilities to turn a simple room into a sophisticated and inviting space, where every detail tells a story and every sip is enjoyed in an atmosphere of tailored elegance. Cheers to the artistry of craft and the joy it brings to both the maker and the beholder.